Launch EC2 only during fixed weekday hours
AWS accounts are assumed to be linked.
To start and stop EC2 automatically every day, you must create an EC2 start job and an EC2 stop job, respectively.
Create EC2 start job
Section titled “Create EC2 start job”-
First, create a task to start an EC2 instance. From the header menu, click[Tasks]-[EC2]-[Start/Stop EC2 Instance].
-
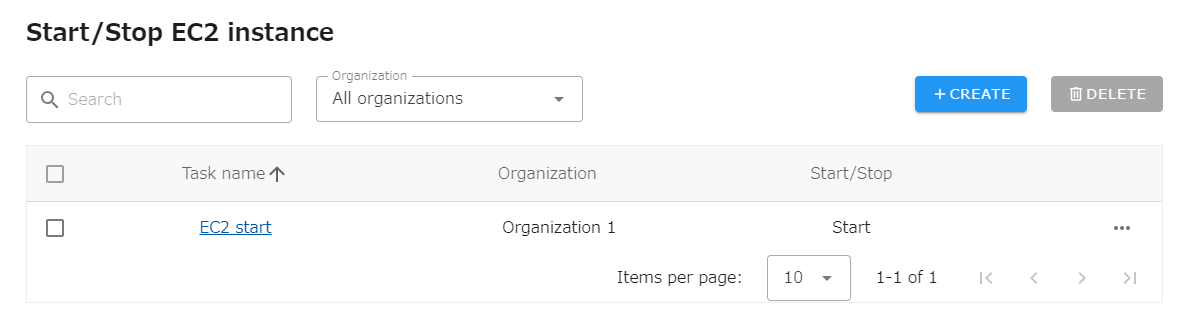
A list of tasks will be displayed. Once you have created a task, you can edit or delete it from this screen. Click the “Create” button since there are no tasks at the beginning.
-
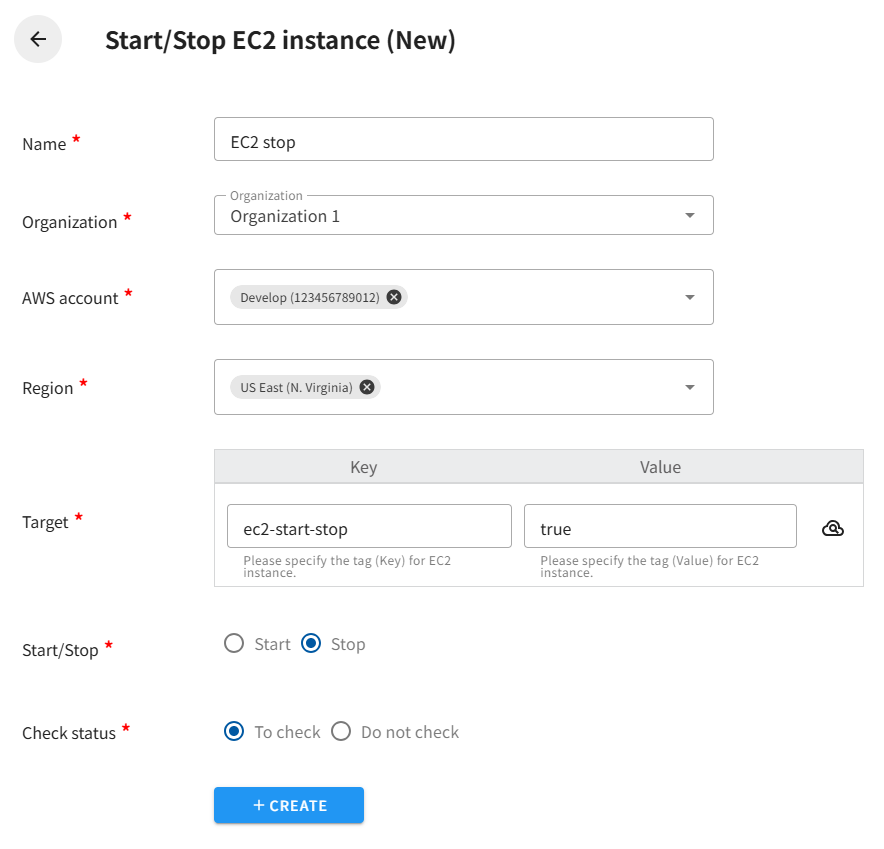
Enter the conditions and click the Save button. For the target tag, specify the tag attached to the EC2 instance. For “Start/Stop,” select “Start.

- Confirm that the EC2 instance start task has been created.
-
Next, create a job. Click on “Jobs” in the header.
-
Click the “Create” button in the upper right corner of the job list.
-
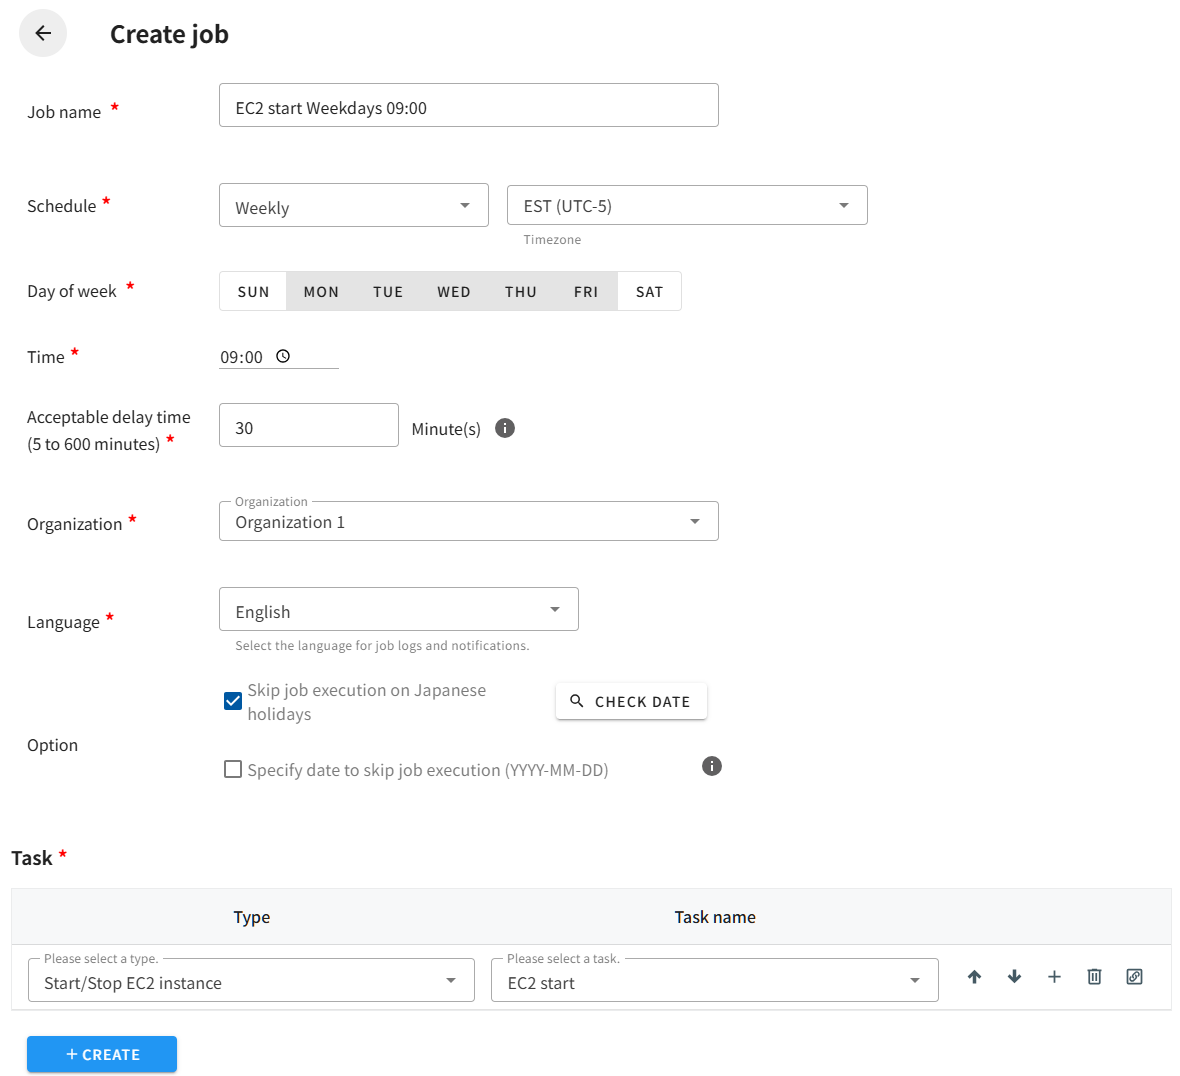
You will be taken to an input screen, where you will set the schedule to “Weekly” and specify the day of the week and time to start the EC2 instance. If you do not want to start EC2 on Japanese national holidays, check the “Skip job execution on Japanese national holidays” checkbox. You can confirm the date to skip by clicking the “Confirm Date” button. Finally, select the task you created in step 3 in the “Tasks” section below.
- Clicking the Create button saves the job and returns it to the job list.
This completes the creation of the start job. Next, create a stop job.
Create EC2 stop job
Section titled “Create EC2 stop job”-
Create a task to stop an EC2 instance. Click “Task” - “Start/Stop EC2 Instance” from the header menu.
-
A list of tasks will be displayed. Click the Create button in the upper right corner
-
As with the “Start Task,” enter the conditions and click the Save button. For “Start/Stop,” select “Stop.
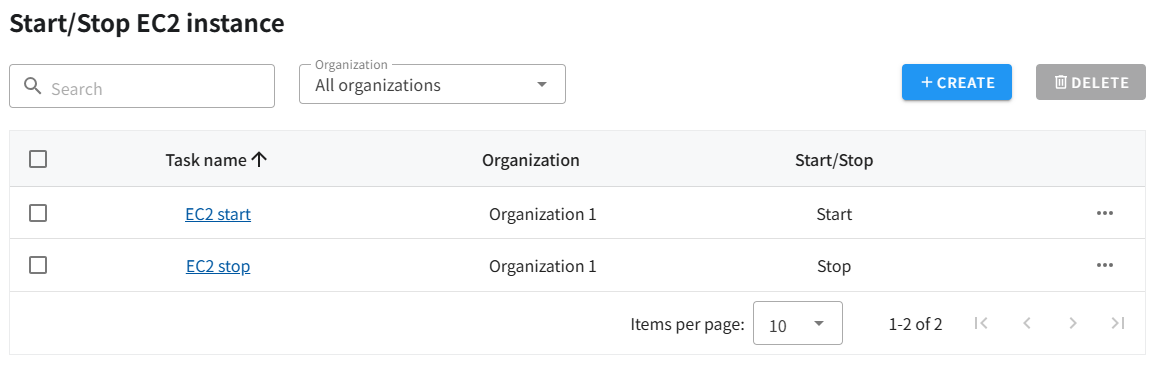
- Confirm that the EC2 instance stop task has been created.
-
Next, create a job. Click on “Jobs” in the header.
-
Click the “Create” button in the upper right corner of the job list.
-
You will be taken to an input screen, where you set the schedule to “Weekly” and specify the day of the week and time to stop the EC2 instance. Next, select the task you created in step 3.
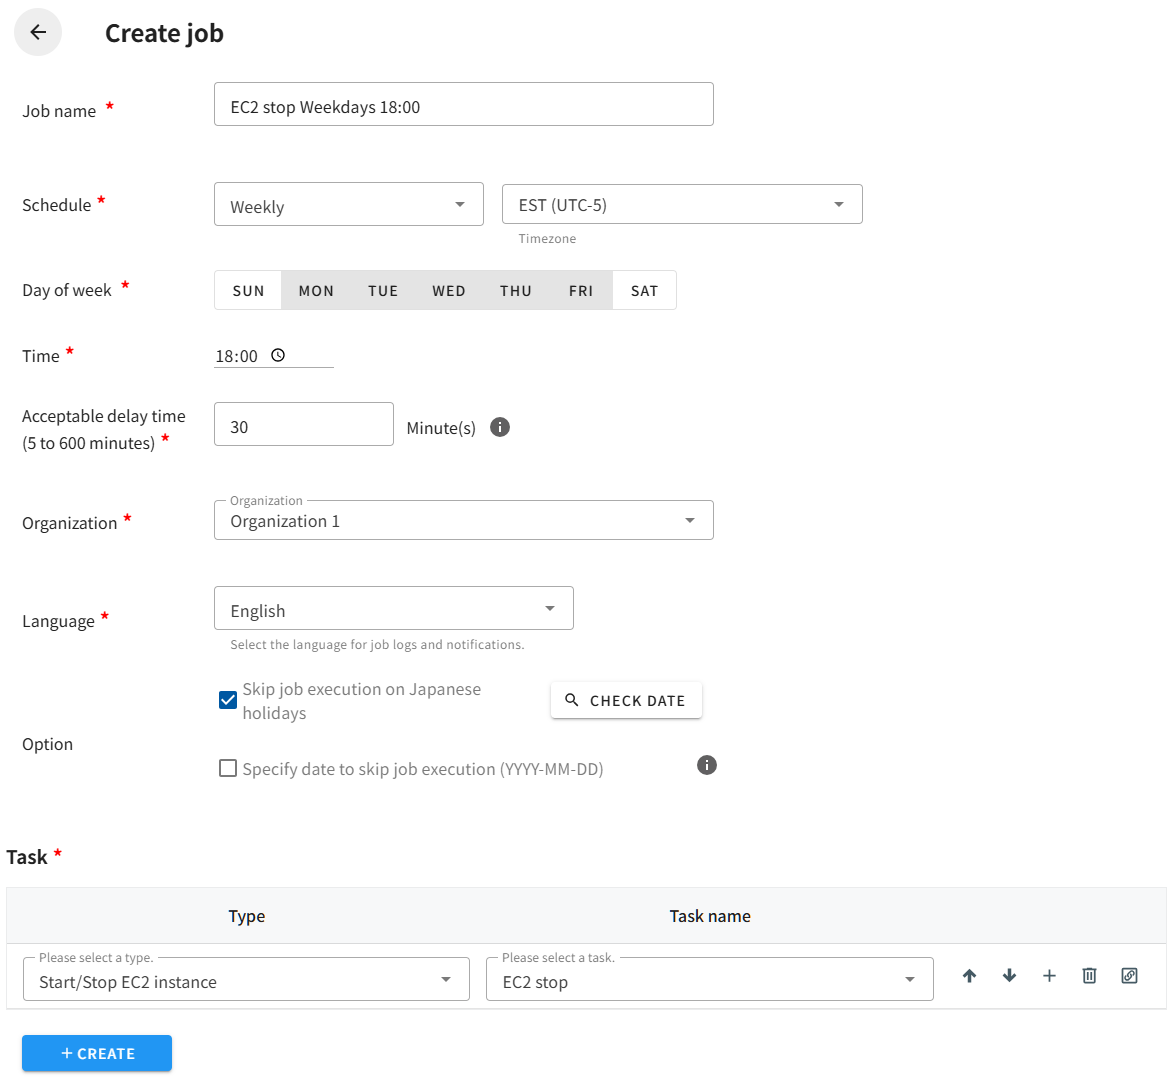
- Clicking the Create button saves the job and returns it to the job list.
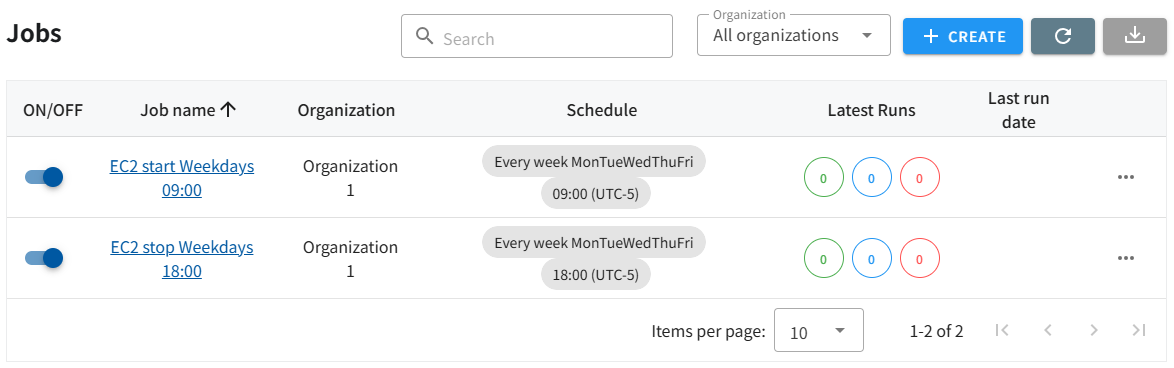
Once the start and stop jobs are completed as described above, the necessary work is complete.
If you want to check the operation of a job, you can execute it immediately by clicking the[…]button of the target job, without waiting for the specified time.